Creating macOS Menu Bar App in SwiftUI
Creating macOS Menu Bar App in SwiftUI
Creating a menu bar app may seem like a complicated task, but it’s actually quite simple. Here’s how you can get started.
Basic SwiftUI App Structure
Typically, you’d create a SwiftUI app using a WindowGroup like this:
1
2
3
4
5
6
7
8
@main
struct MyApp: App {
    var body: some Scene {
        WindowGroup {
            ContentView()
        }
    }
}
However, to create a menu bar app, you simply replace WindowGroup with MenuBarExtra. Here’s how:
1
2
3
4
5
6
7
8
9
10
@main
struct MyApp: App {
    var body: some Scene {
        MenuBarExtra {
            ContentView()
        } label: {
            MyAwesomeLabel()
        }
    }
}
MenuBarExtraStyle
As of the time of writing, there are two MenuBarExtraStyle options: menu (the default) and window.
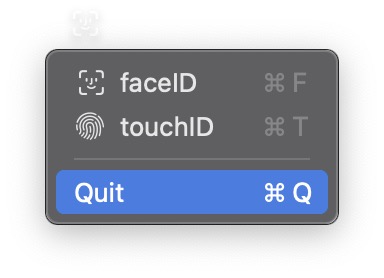
Using the menu Style
The menu style renders your view in a list format:
1
2
3
4
5
6
7
8
9
10
11
12
13
14
15
16
17
18
19
20
21
22
23
24
25
26
27
28
29
30
31
32
33
34
35
36
37
38
39
40
41
42
43
44
45
46
47
48
49
50
51
52
53
54
@main struct MyApp: App {

    @State private var authMethod: AuthMethod = .faceID

    var body: some Scene {
        MenuBarExtra {
            ForEach(AuthMethod.allCases) { method in
                Button {

                } label: {
                    HStack {
                        method.icon
                        Text(method.rawValue)
                    }
                }
                .keyboardShortcut(method.shortcut)
            }

            Divider()

            Button("Quit") {
                exit(0)
            }
            .keyboardShortcut("q")
        } label: {
            authMethod.icon
        }
    }
}

enum AuthMethod: String, CaseIterable, Identifiable, Hashable {
    case faceID
    case touchID

    var id: Self { self }

    var icon: Image {
        switch self {
            case .faceID:
                    .init(systemName: "faceid")
            case .touchID:
                    .init(systemName: "touchid")
        }
    }

    var shortcut: KeyEquivalent {
        switch self {
            case .faceID:
                "f"
            case .touchID:
                "t"
        }
    }
}
Using the window Style
The window style allows you to customize the view however you like:

1
2
3
4
5
6
7
8
9
10
11
12
13
@main struct MyApp: App {

    var body: some Scene {
        MenuBarExtra {
            Text("Whatever")
                .font(.largeTitle)
                .padding()
        } label: {
            Text("Can also be text")
        }
        .menuBarExtraStyle(.window)
    }
}
Example Menu Bar App
Here’s an example of a menu bar app I built: JSON Formatter.
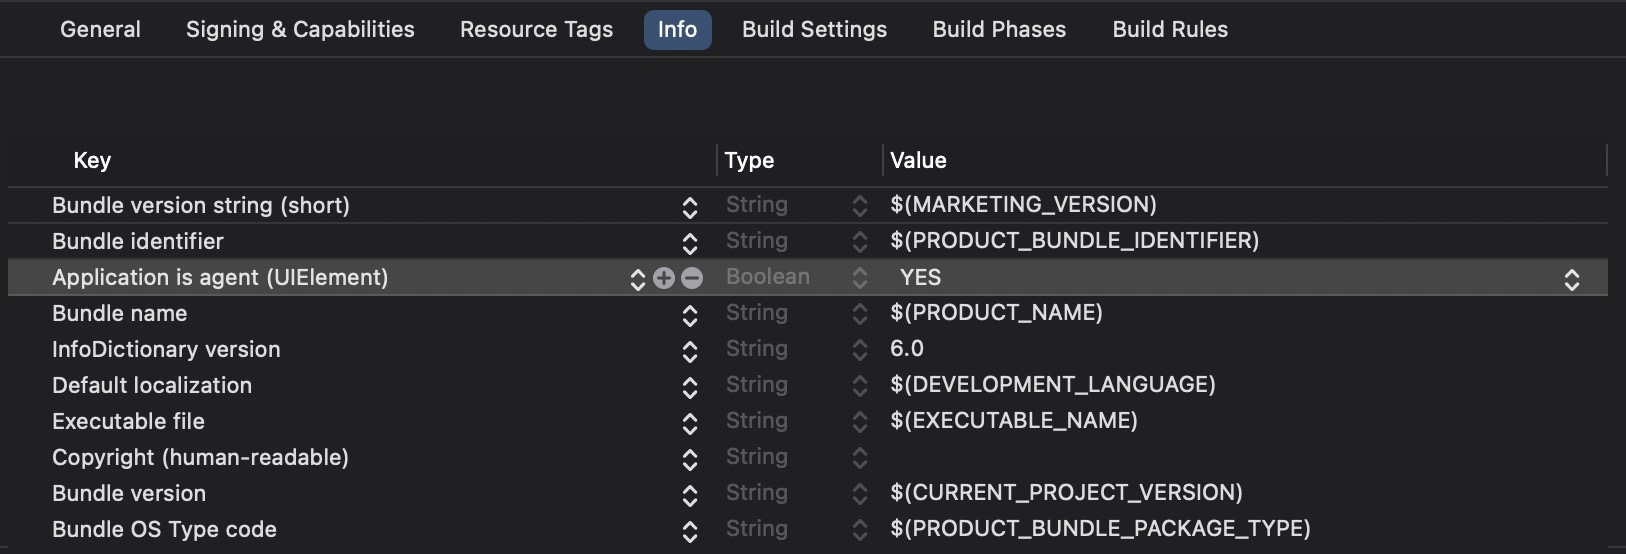
Hiding the Dock Icon
By default, your app will show an icon in the Dock. To hide it, update the Info.plist file in your project. Add the key: Application is agent (UIElement) with the value YES.
This post is licensed under CC BY 4.0 by the author.