Animatable Auto-Sized-To-Fit SwiftUI Sheet
SwiftUI’s sheet modifier is a fantastic tool, but it comes with limitations: it doesn’t automatically resize to fit its content. Apple introduced the .presentationSizing(.fitted) modifier in iOS 18 to address this issue. However, let’s be realistic—convincing your Product Manager to set the minimum deployment target to iOS 18 might not be an easy sell. Sure, you could conditionally enable this feature for users on iOS 18+, but what about those on older OS versions?
In this article, we’ll explore how to create an auto-sized-to-fit sheet that works on iOS 17.
Basic Code Structure
Let’s start by setting up the basic structure that we’ll build upon throughout this post:
1
2
3
4
5
6
7
8
9
10
11
12
13
14
15
16
17
18
19
20
21
22
23
24
25
26
27
Color.clear
.sheet(isPresented: .constant(true)) {
MyView()
}
struct MyView: View {
@State private var condition: Bool = false
var body: some View {
VStack {
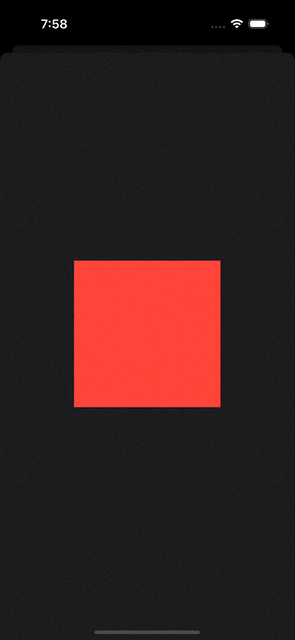
Color.red
.frame(width: 200, height: 200)
if condition {
Color.blue
.frame(width: 200, height: 200)
.transition(.scale)
}
}
.onTapGesture {
withAnimation {
condition.toggle()
}
}
}
}
Making the Sheet Auto-Resize to Fit
To make the sheet automatically resize to fit its content, we can define custom presentationDetents:
1
2
3
4
5
6
7
8
9
10
11
12
13
14
15
16
17
18
19
20
Color.clear
    .sheet(isPresented: .constant(true)) {
        MyView()
            .modifier(MyAmazingSheetModifier())
    }

struct MyAmazingSheetModifier: ViewModifier {

    @State private var presentationDetents: Set<PresentationDetent> = [.medium]

    func body(content: Content) -> some View {
        content
            .presentationDetents(presentationDetents)
            .onGeometryChange(for: CGSize.self) { proxy in
                proxy.size
            } action: { newValue in
                presentationDetents = [.height(newValue.height)]
            }
    }
}

Adding Animation to the Sheet Resizing
If you try the above, you’ll notice that the sheet resizes without animation. Let’s fix that:
1
2
3
4
5
6
7
8
9
10
11
12
13
14
15
16
17
18
19
20
21
struct MyAmazingSheetModifier: ViewModifier {

    @State private var presentationDetents: Set<PresentationDetent> = [.medium]
    @State private var selectedPresentationDetent: PresentationDetent = .medium

    func body(content: Content) -> some View {
        content
            .presentationDetents(presentationDetents, selection: $selectedPresentationDetent)
            .onGeometryChange(for: CGSize.self) { proxy in
                proxy.size
            } action: { newValue in
                presentationDetents.insert(.height(newValue.height))
                selectedPresentationDetent = .height(newValue.height)
            }
            .transaction { transaction in
                transaction.addAnimationCompletion(criteria: .removed) {
                    presentationDetents = [selectedPresentationDetent]
                }
            }
    }
}

Why This Works
SwiftUI animates changes in selectedPresentationDetent only if the old value is also in the presentationDetents set. To enable smooth animation:
- Add the new height to the
presentationDetentsset. - Update the
selectedPresentationDetentto animate the transition. - Remove the old detent after the animation completes, preventing users from manually adjusting the sheet height.
Fixing Layout Jumps in Animations
You may notice that the red rectangle’s frame is affected when the blue rectangle appears, causing a jarring animation. This happens because MyView’s frame changes. To address this, we can wrap the content in a ScrollView:
1
2
3
4
5
6
7
8
9
10
11
12
13
14
15
16
17
18
19
20
21
22
23
24
25
struct MyAmazingSheetModifier: ViewModifier {

    @State private var presentationDetents: Set<PresentationDetent> = [.medium]
    @State private var selectedPresentationDetent: PresentationDetent = .medium

    func body(content: Content) -> some View {
        ScrollView {
            content
                .presentationDetents(presentationDetents, selection: $selectedPresentationDetent)
                .onGeometryChange(for: CGSize.self) { proxy in
                    proxy.size
                } action: { newValue in
                    presentationDetents.insert(.height(newValue.height))
                    selectedPresentationDetent = .height(newValue.height)
                }
                .transaction { transaction in
                    transaction.addAnimationCompletion(criteria: .removed) {
                        presentationDetents = [selectedPresentationDetent]
                    }
                }
        }
        .scrollDisabled(true)
        .frame(maxWidth: .infinity, alignment: .center)
    }
}
The ScrollView ensures that the content stays anchored to the top, mimicking the behavior of a ScrollView itself.

Supporting Modal Style on Larger Devices
On devices like iPads or Macs, SwiftUI’s sheet behaves like a modal rather than a bottom sheet. To make this modal fit its content, we can use the .presentationBackground modifier, introduced in iOS 16.4:
1
2
3
4
5
6
7
8
9
10
struct MyModalModifier: ViewModifier {

    func body(content: Content) -> some View {
        content
            .presentationBackground(Color.clear)
            .padding()
            .background(.regularMaterial)
            .clipShape(.rect(cornerRadius: 15))
    }
}

Combining Bottom Sheet and Modal Styles
To seamlessly support both bottom sheets and modals, we can adapt based on the environment’s horizontalSizeClass. However, since horizontalSizeClass always returns .compact when read inside a sheet, we need to handle this in a custom way:
1
2
3
4
5
6
7
8
9
10
11
12
13
14
15
16
17
18
19
20
21
22
23
24
25
26
27
28
29
30
31
32
Color.clear
    .mySheet(isPresented: .constant(true)) {
        MyView()
    }

extension View {

    func mySheet<Content: View>(isPresented: Binding<Bool>, @ViewBuilder content: () -> Content) -> some View {
        self.modifier(MyAmazingSheetModifier(isPresented: isPresented, sheetContent: content()))
    }
}

struct MyAmazingSheetModifier<SheetContent: View>: ViewModifier {

    @Binding var isPresented: Bool

    let sheetContent: SheetContent

    @Environment(\.horizontalSizeClass) private var horizontalSizeClass

    func body(content: Content) -> some View {
        content.sheet(isPresented: $isPresented) {
            if horizontalSizeClass == .compact {
                sheetContent
                    .modifier(MyBottomSheetModifier())
            } else {
                sheetContent
                    .modifier(MyModalModifier())
            }
        }
    }
}
Now, the sheet automatically adapts to either bottom sheet or modal style, resizing to fit its content with smooth animations when the content size changes.